There are a couple of ways (known to me) of crocheting in rounds without turning your work. You can work in spiral rounds, where you do not join rounds but simply start each following round from the top of the first stitch of the round below. Alternatively, you can work in joined rounds, whereby the beginning of each round is raised with a chain, so the last stitch of the round ends up at the same level as the first stitch at the start of the round. The end of the round is joined to the start of the round with a slip stitch. The latter approach is what this tutorial is about.
I have come across a few methods of working joined rounds with single crochet and, if you are working from a pattern, it will generally state which method is to be used. The key to success is to stick to the method suggested and to follow it consistently. If you have been directed to this page from one of my patterns, scroll down to Method 3, as this is the one I use.
To illustrate these methods, I have made a chain of 20 stitches, joined it in a circle and then worked up a tube in single crochet stitches.
Method 1: JOINING TO THE RAISING CHAIN
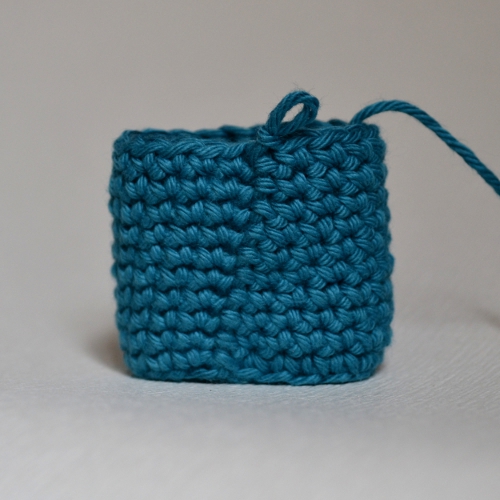
One of the most common methods is to join the round with a slip stitch to the rather inconspicuous raising chain worked at the start of the round. To start each following round, a raising chain is made and the first stitch is then worked in the top of the first stitch of the round below.
Here is what my tube looks like after I have completed a few rounds:
Method 2: JOINING TO THE FIRST SINGLE CROCHET STITCH OF THE ROUND BELOW
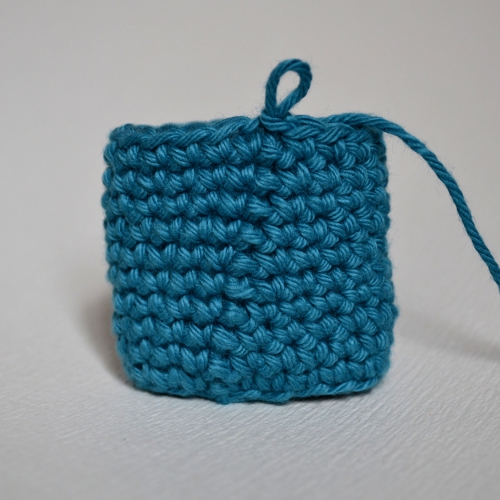
Since the raising chain is quite small and not very easy to work in, a lot of crocheters prefer to join the end of the round to the top of the first singe crochet stitch worked at the start of the round, ignoring the raising chain. To start each following round, a raising chain is worked and the first single crochet is worked in the same stitch as the joining slip stitch. A typical mistake would be to skip it and to go straight to the next stitch, thus running short of one stitch at the end of the round.
Here is what my tube looks like after I have completed a few rounds in this manner:
Method 3: WORKING IN THE SLIP STITCH AT THE END OF THE ROUND
(This is the method I have so far used in my baby booties patterns. So if you have been directed to this page by a link in the pattern you purchased, this part should be of interest to you.)
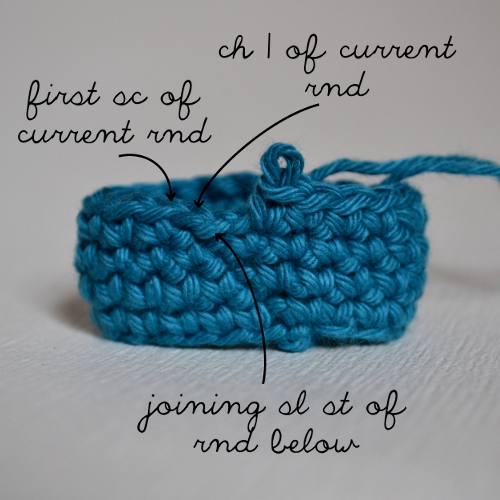
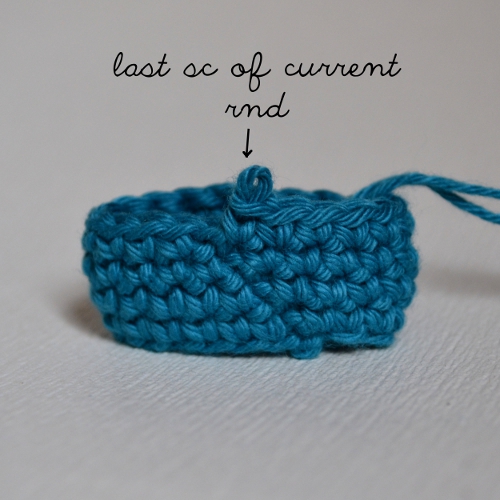
This method attempts to hide the “ladder” seam created by joining slip stitches. To start a round, a raising chain (ch 1) is made. The first single crochet stitch is then worked in the second stitch of the round below. Here is what I have at the end of each round before I work the last stitch:
I now work my last stitch of the current round in the joining slip stitch of the round below:
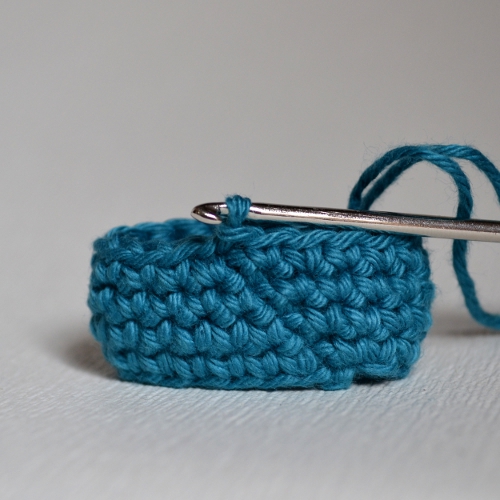
I join the last single crochet stitch to the first single crochet stitch of the round below with a slip stitch, but I don’t tighten it up, since I will be working in it at the end of the row:
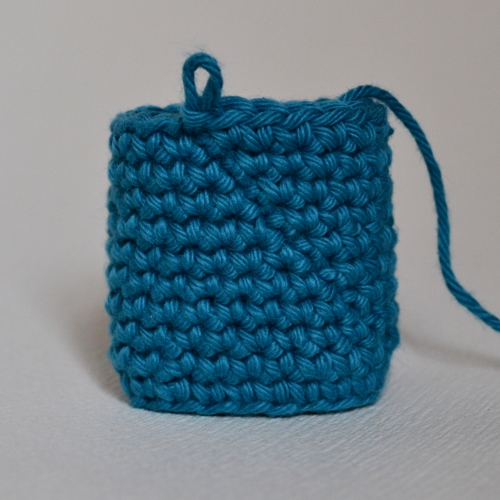
This is what my tube looks like after I have worked a few rounds with this method:
I personally prefer the look of the seam in Method 3, which is why I use it in my patterns, even though the seam does have a lot more slant to it.
Once again, if you are working from a pattern it is essential to follow the method suggested – it is generally either of the first two methods. Method 3 is quite unconventional and is not easily substitutable by the first two methods, so use it discretely and only if the pattern states so (like mine do!).
